Sticky Situation
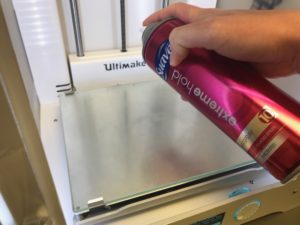
Apply hairspray to your build plate to prevent warping around the edges of your parts.
Last updated February 2019
Disclaimer
ProteShea, LLC is a participant in the Amazon Services LLC Associates Program, an affiliate advertising program designed to provide a means for sites to earn advertising fees by advertising and linking to Amazon.com
Some links may be affiliate links, in which ProteShea, LLC earns a commission if you use that affiliate link. Please note that this is at no additional cost to you and helps us in creating more content.
You have your new 3D printer setup, your part modeled, your first job prepared with a slicing application, and you send the job to the printer via Ethernet, USB cable, or USB drive. Hopefully Ethernet because you don’t even have to move your laptop! Filament loaded – check, bed level – check. The printer moves gracefully as it spits out the first layer, second layer, third layer. This is a piece of cake to use. I need some coffee you say to yourself, the printer will be fine. You come back fully charged and take a glance at the print. Why is my part lifting off the print bed!? It always happens when you’re not looking. You’re confused, angry, and ready to chuck the printer off of a three-story building. Hold on a second. We can fix this. We’re problem solvers, remember?

Let’s take a look at our options:
- Throw the printer off of a building and never 3D print again. Negative.
- Use a heated, glass print bed. Most 3D printer manufacturers have moved to a heated, glass print bed so you should be okay there.
- Apply tape to the print bed. This does work but the tape never lays flat. You always get little ripples in the tape which makes the bottom of your part have those same ripples in it.
- Add a brim around the edge of your part. You can apply this in your slicing software but sometimes, this even starts to lift up or warp.
- Glue. A decent option, but if we’re considering cost, it’s a little more expensive.
- Hairspray. Now we’re talking – relatively cheap, easy to apply, and comes off easy after a print.
I went through all of these options. My first 3D printer didn’t have a glass print bed so I purchased one that would fit, mounted it, and gave it a go. It worked on some but not all. I added the brim to the part. Still, the problem persisted. I finally tried the last two options which ended up working. I received two glue sticks with the purchase of my 3D printer. Those quickly ran out and I bought a can of the hairspray due to the lower cost. You don’t need a lot of hairspray – a single layer will work perfectly. I know you won’t take my word for it, so apply as many layers as you think.
What did we learn?
- The first or second solutions may not always work. Don’t get discouraged. Keep trying, read forums, and see what other people have gotten to work. There is a big 3D printing community out there so it’s easy to find resources.
- Sometimes you have to try a combination of things to get it to work. In this case, it was combining a heated, glass print bed with a thin film of hairspray.
- Learning a new piece of equipment can be challenging at first. Stay persistent and you will be an expert in no time. Aren’t you glad you didn’t throw your printer off of a building?