Check Your Path
Concerned that you may have a break in your wire or crack in your PCB trace? Perform a continuity check to verify.
Last updated March 2019
Disclaimer
ProteShea, LLC is a participant in the Amazon Services LLC Associates Program, an affiliate advertising program designed to provide a means for sites to earn advertising fees by advertising and linking to Amazon.com
Some links may be affiliate links, in which ProteShea, LLC earns a commission if you use that affiliate link. Please note that this is at no additional cost to you and helps us in creating more content.
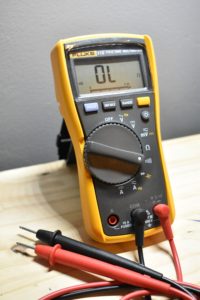
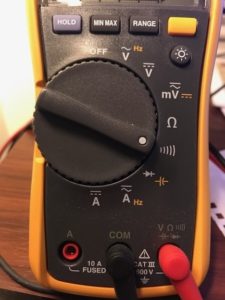
A voltmeter is definitely something that everybody should have in their toolbox. You can do all sorts of things with it like check if your batteries still have a charge, check the resistance of a resistor or the capacitance of a capacitor, and check the voltage and current of a circuit. One thing that’s really helpful is what’s called continuity which is a common feature on any voltmeter. The symbol usually looks like a sideways WiFi symbol that is in the picture below.


The main ways we use the continuity function is to check if there is continuity on a trace on a PCB or on a wire in a harness. Let’s start with the PCB first. It is possible for a trace to be cracked whether it’s from a manufacture defect or pushing too much current through the trace. Side note: you must spec your traces based on the maximum current flowing through. For example, a trace used for power will be much wider than a trace used for a digital signal. If you suspect that your trace is cracked, one of the quickest ways to determine that is to perform a continuity check by placing one of the voltmeter leads on one end of the trace and one lead on the other end of the trace.

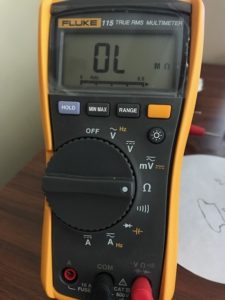
You might have to depopulate a component or two to be able to gain access to the trace. If there is no crack in the trace, then you will hear a beep on your voltmeter. If there is a crack, well, you can try soldering a jumper wire on or you have yourself a nice paper weight. One thing to be cautious of is that performing a continuity check does inject a voltage so you want to make sure that your circuits are powered off so you don’t damage them. Another thing you could do that is similar to a continuity check is to use the resistance feature which is denoted by an Ohm symbol. If you have a break in your trace, the resistance will be very high. This is what my voltmeter reads when the resistance is infinity.
Next, we have continuity checks for wires. Sometimes when you crimp on the connector, you don’t always make a good connection and the wire could wiggle its way out due to vibration or some other force. The crimp could also back out of the connector due to the aforementioned reasons. A quick way to check if this has happened is to perform a continuity check by placing one lead of the voltmeter on one end of the wire and the other lead on the other end of the wire.
What did we learn?
- Performing continuity checks is a powerful debugging tool. We usually perform these checks right away if we suspect an issue because it’s the easiest.
- There are two methods to perform the checks on a voltmeter: continuity or resistance.