Analog Input Channels
Last updated May 2019
Introduction
Welcome to ProteShea – if you’ve followed through our previous tutorials, you should have a good understanding of how to use the digital I/O for control, communication, and reading inputs on the Arduino Uno (rev 3). In this project, we’re going to show you how to use the analog input channels on the Arduino Uno. The number of channels varies for every Arduino board, but the Uno has six channels. Let’s use them all! You’ll learn how to read each channel and display the value into an organized table on the Serial Monitor.
Disclaimer
ProteShea, LLC is a participant in the Amazon Services LLC Associates Program, an affiliate advertising program designed to provide a means for sites to earn advertising fees by advertising and linking to Amazon.com
Some links may be affiliate links, in which ProteShea, LLC earns a commission if you use that affiliate link. Please note that this is at no additional cost to you and helps us in creating more content.
Here’s what you’ll need to get started:
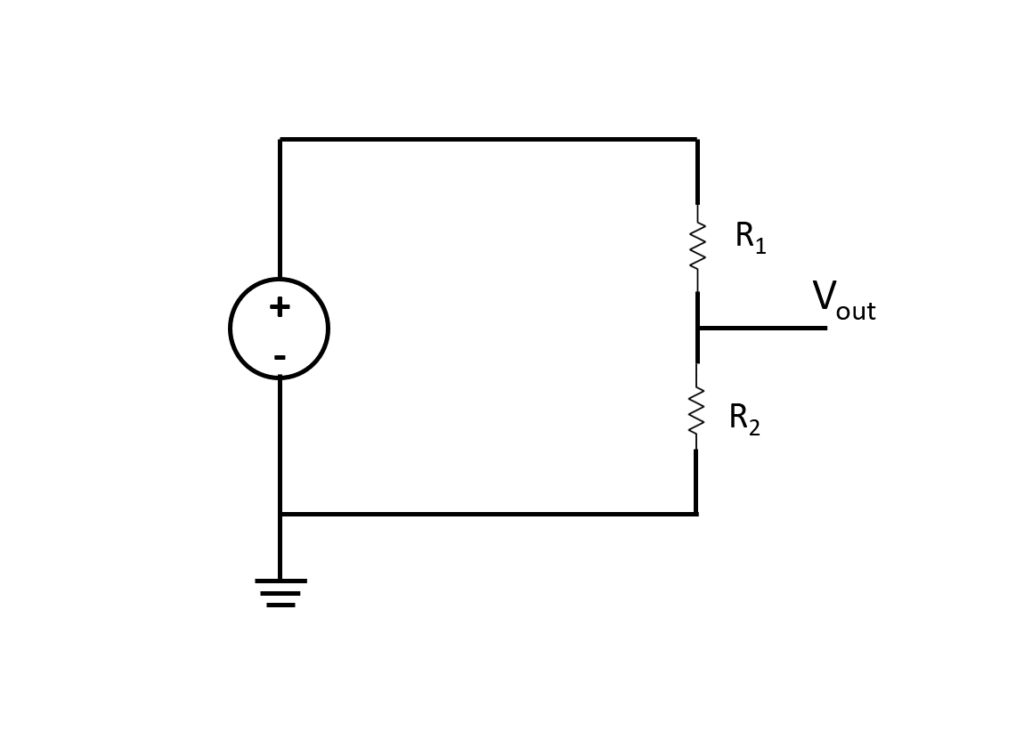
Potentiometer
The potentiometer is a component that consists of 3 pins and allows you to quickly vary the internal resistance. By varying the resistance, the output voltage is changed between 0V and the maximum voltage that the potentiometer is tied to. For example, if pin 1 is tied to +5Vdc and pin 3 is tied to 0V (GND), the output voltage on pin 2 will vary between 0V and +5V. The potentiometer acts as a voltage divider circuit, as shown below.
Analog Input
On each analog input channel, there is a 10-bit analog-to-digital (ADC) converter. Being that it has a 10-bit resolution, we can acquire samples ranging from 0 to 1023 (2^10 – 1). If your voltage range is from 0-5V, 0V will be mapped to 0 and 5V will be mapped to 1023. To figure out what each voltage between 0V and 5V will get mapped to, we can use the ratio below.

Let’s say we acquire a voltage sample of 1V. We know n, the max input voltage, and the voltage sample, so we can solve for the ADC value, as shown below. Since the solution is not a whole number, the ADC will round down to the nearest whole number which is 204.

Wiring the Circuit
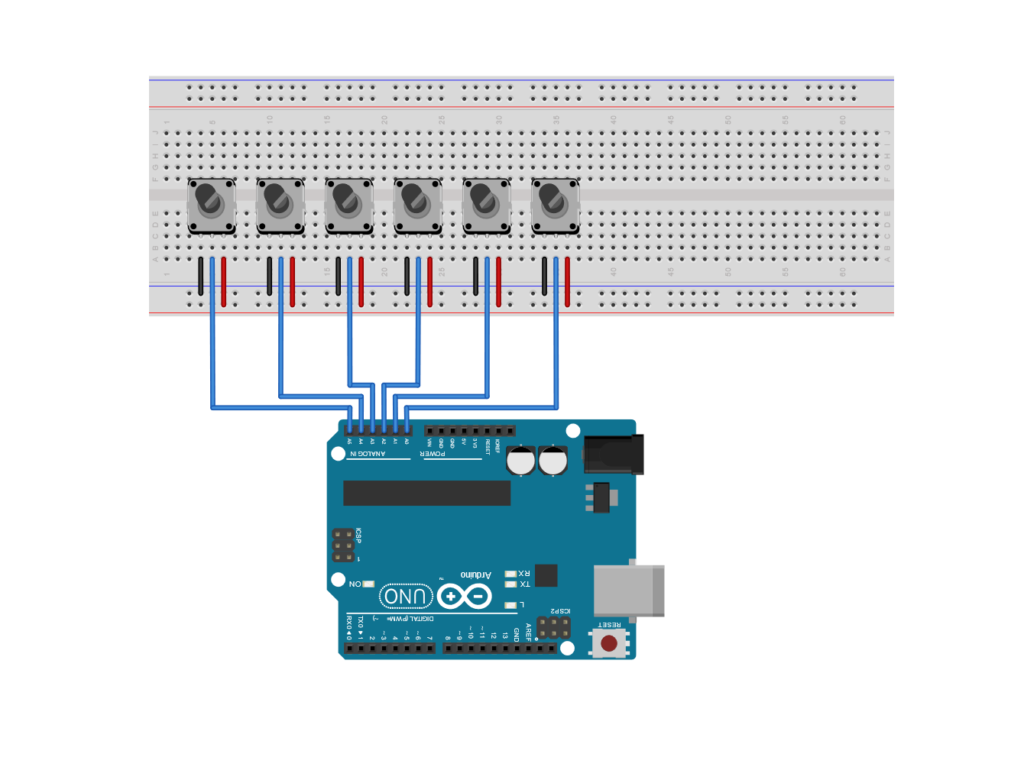
Place six 10kΩ potentiometers onto the breadboard. Wire pin 3 of each potentiometer to the positive voltage rail and pin 1 to the negative rail of the breadboard. Insert a male jumper into each node that pin 2 of the potentiometers are connected to. Then, wire the other end of each jumper to Analog Inputs 0-5. A circuit schematic is shown below.
FuelCan Wiring
I placed the breadboard in the bottom storage compartment to limit the length of the jumper wires and mounted the Arduino Uno to the FuelCan’s prototyping area. We need to supply +5V and GND to the power and ground rails on the breadboard. Use the provided banana jack to test-lead clip cables to do so. You will need two male header pins to mount the test-lead clips on the breadboard side. Plug the Type A side of the USB cable into USB1 receptacle and the Type B side into the Uno’s receptacle. Power up the FuelCan with the AC-DC power adapter.
Software
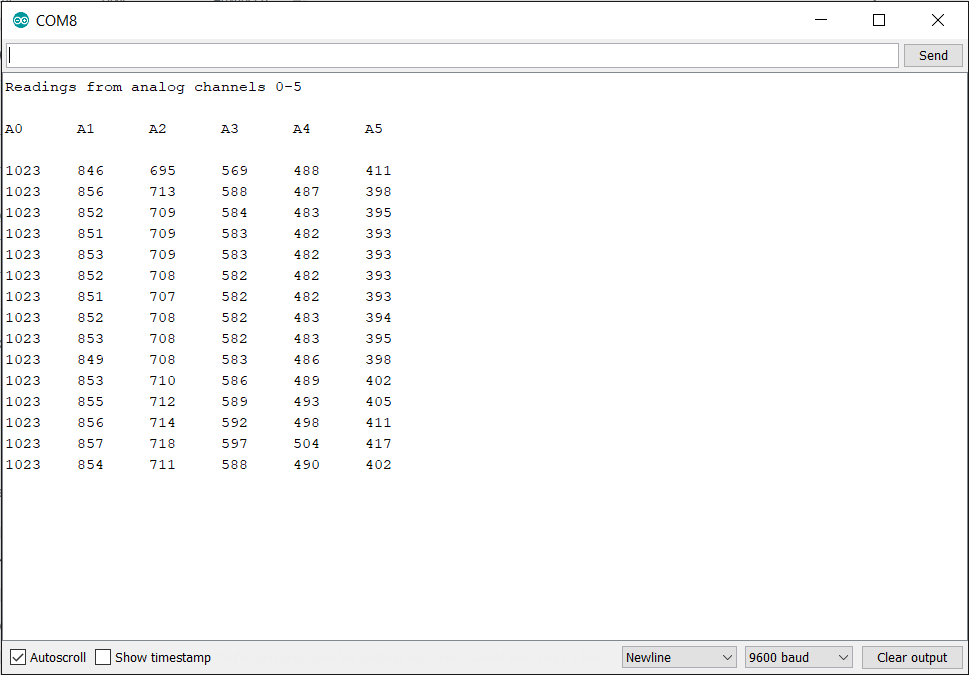
Once the wiring is complete and the FuelCan is powered up, we can now load the sketch onto the Uno. The sketch is below. It sets up the serial terminal between the Uno and the host. The analog values are read from each analog input and the values are sent to the host to display them on the Serial Monitor. Rotate each potentiometer clockwise and counterclockwise to watch the values change from 0 to 1023.
About Author
Eric Shea is the founder of ProteShea and is an electrical engineer. He wishes to have a major impact on bridging the gap between engineering theory and real-world applications. He has worked at Kratos Defense, SpaceX, Air Force Research Laboratory, and Polaris Industries. He received a M.S. in electrical engineering from the University of Pittsburgh and a B.S. in electrical engineering from the University of Florida.